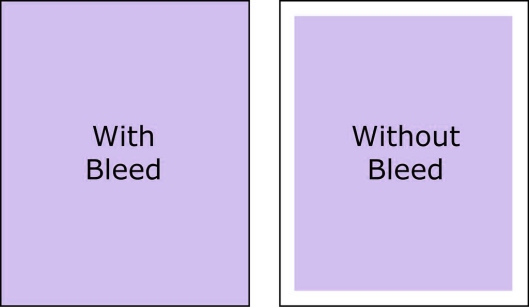
Bleeds. A printing term that refers to the printing that goes beyond the edge of the sheet after trimming. In other words, the bleed is the area to be trimmed off when completing your finished product. Bleeds are one of the most important elements to factor in when designing for print or just looking to get something printed at your local printing house, like us!
Sadly though, this is one element that is commonly over-looked which can result in huge re-print costs and time consuming man hours refitting, resizing, and sometimes re-designing. Sad right? No worries, no matter what your program with just a click here and a click there we can get you set up from the get go to not only save you time, but money. We all like happy piggy banks!
First off, let’s chat just a little more about the difference between files printed with a bleed and those without. Have you ever put together a file that had colour going right to the edge of the page (poster, cover of a report, etc), but when you printed it you get a white border around the edge? It is very difficult to print exactly to the edge of a sheet of paper/card. Event the biggest print houses cannot achieve this for all print machines needs a small amount of space to account for movement of the paper and design inconsistencies, hence that white edge.
This is where our bleeds come in handy. By having the print area set up a little larger than the final size of your document we are then able to trim off those nasty white edges but keep the exact size of your document in tack. Now, on to setup!
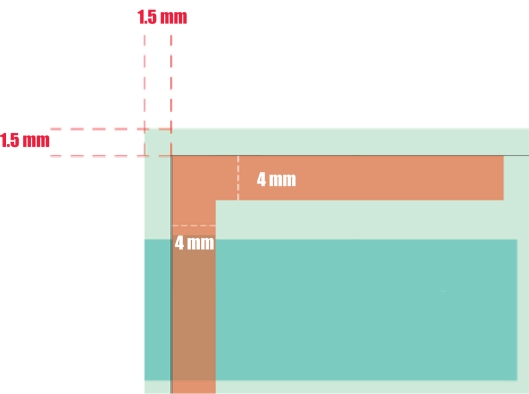
Setup for this depends on your program, the easiest one to use for this is of course Adobe Illustrator or Indesign which offer an automatic setup for bleeds. When opening a new file you can do this in the setup box, or if you already have a file open go to File, Document Setup and adjust the bleeds there. We recommend 1.5mm.
Other programs such as Word, PDF, or Powerpoint are a little more difficult as they do not allow for bleeds in any scenario. However, all hope is not lost, you can still get full colour prints with no white border by doing one of two things:
1) Create your Word doc, PDF, or Powerpoint slides in a custom size of paper, we recommend adding 1.5mm to each of the edges. e.g. A4 document (210mm × 297mm)? Create a custom size that is 213mm x 300 mm.*
*When printing be sure to ask your printer to trim to size.
2) Or, take in your file as is and explain to your printer you need the files bleed to the edge, it will take them only a few minutes to resize for you and saves you any hassle!*
*Cutting may incur an extra cost, but this cost is usually small.
Once your bleeds are setup make sure your colour still goes right to the edge or else you will be left with the same scenario, only a bigger white border. However you are creating your print, remembering bleeds will leave you with beautiful prints that look exactly how you designed! No surprise borders, extra costs, re-prints, the list goes on! Who needs the hassle, two minutes could save your project.


